How to Make Tied Fleece Blankets
These blankets don't require special skills, but you will need someone who can safely use sharp scissors.
Here is What You'll Need
Equipment / Tools
Scissors
Ruler
Cutting mat/ Open Area
Ruler
Pen or pencil
Materials
1 1/2 yard anti-pill fleece
Instructions
Cutting the Materials
When you purchase fleece by the yard, it almost always needs to be trimmed and straightened. At the very least, you need to cut off the selvage edge.
Start out by laying the piece of fleece that will be the back of your blanket, right side down, on your work surface. This works best on a large area of the floor. Smooth out the piece of fleece with your hands.


Now, lay the piece of fleece that will be the front of your blanket, right side up, on top of the first piece of fleece. Again, smooth out the piece of fleece so it lies flat.
Cut through both pieces of fleece, trimming it to whatever size you want your blanket to be and squaring up the edges. The cuts do not have to be perfectly even, but they should be relatively straight. Keep in mind that the finished blanket will appear about 10 to 12 inches smaller than the size you cut because of the fringe.

Measure and Cut the Blanket Corners
Measure a square at each corner that is the same length as what you want the fringe to be. The sample fringe is about 6 inches long, so the square is 6 inches from each side in the corner. You can adjust this if you'd like, starting with a square that is anywhere from 4 inches to 8 inches.
If you are using a rotary cutter, align the cutting ruler and cut the square.
If you are using a pencil and scissors, mark the lines for the square. Cut out the square with scissors.
Repeat this for each corner. Make sure that you cut through both layers of the fleece. Try to cut as straight as possible, but don't worry about the lines being perfectly even. Once they are tied together, you will never notice any differences.


Cut the Blanket Fringe
Next, start making the fringe along each edge, cutting through both thicknesses of fleece. Each strip should be the same length as your starter square and anywhere from 1 inch to 2 inches wide. The sample is 6 inches long and 2 inches wide.

If you're using a rotary cutter, use the ruler to measure and cut the strips, working around the entire blanket.
If you're using scissors, measure and mark all the fringe lines first. Then go back and cut the marked lines. This will help keep the cuts straight.
Depending on the size of your blanket, the fringe cuts may not come out even on their own. You don't want a tiny or huge strip at the end. To fix this, when you get about 18 inches from one end, measure how much is left to mark or cut. If the width of the strips doesn't go into that length evenly, adjust the width of the strips slightly.
For example, if you have about 15.5 inches left, start making the fringe just a tiny bit narrower. Measure again after a few strips to be sure that the fabric divides evenly now.


Tying the Fringe
To attach the top piece of fleece to the bottom piece of fleece, tie the fringe together. Hold a set of fringe pieces (a back and front piece), and tie a square knot.

Tie each knot so it is tight, but try not to pull at the fabric too much.


Here is What You'll Need
Equipment / Tools
Scissors
Ruler
Cutting mat/ Open Area
Ruler
Pen or pencil
Materials
1 1/2 yard anti-pill fleece
Instructions
Cutting the Materials
When you purchase fleece by the yard, it almost always needs to be trimmed and straightened. At the very least, you need to cut off the selvage edge.
Start out by laying the piece of fleece that will be the back of your blanket, right side down, on your work surface. This works best on a large area of the floor. Smooth out the piece of fleece with your hands.


Now, lay the piece of fleece that will be the front of your blanket, right side up, on top of the first piece of fleece. Again, smooth out the piece of fleece so it lies flat.
Cut through both pieces of fleece, trimming it to whatever size you want your blanket to be and squaring up the edges. The cuts do not have to be perfectly even, but they should be relatively straight. Keep in mind that the finished blanket will appear about 10 to 12 inches smaller than the size you cut because of the fringe.
Measure and Cut the Blanket Corners
Measure a square at each corner that is the same length as what you want the fringe to be. The sample fringe is about 6 inches long, so the square is 6 inches from each side in the corner. You can adjust this if you'd like, starting with a square that is anywhere from 4 inches to 8 inches.
If you are using a rotary cutter, align the cutting ruler and cut the square.
If you are using a pencil and scissors, mark the lines for the square. Cut out the square with scissors.
Repeat this for each corner. Make sure that you cut through both layers of the fleece. Try to cut as straight as possible, but don't worry about the lines being perfectly even. Once they are tied together, you will never notice any differences.
Cut the Blanket Fringe
Next, start making the fringe along each edge, cutting through both thicknesses of fleece. Each strip should be the same length as your starter square and anywhere from 1 inch to 2 inches wide. The sample is 6 inches long and 2 inches wide.
If you're using a rotary cutter, use the ruler to measure and cut the strips, working around the entire blanket.
If you're using scissors, measure and mark all the fringe lines first. Then go back and cut the marked lines. This will help keep the cuts straight.
Depending on the size of your blanket, the fringe cuts may not come out even on their own. You don't want a tiny or huge strip at the end. To fix this, when you get about 18 inches from one end, measure how much is left to mark or cut. If the width of the strips doesn't go into that length evenly, adjust the width of the strips slightly.
For example, if you have about 15.5 inches left, start making the fringe just a tiny bit narrower. Measure again after a few strips to be sure that the fabric divides evenly now.
Tying the Fringe
To attach the top piece of fleece to the bottom piece of fleece, tie the fringe together. Hold a set of fringe pieces (a back and front piece), and tie a square knot.
Tie each knot so it is tight, but try not to pull at the fabric too much.
Finishing
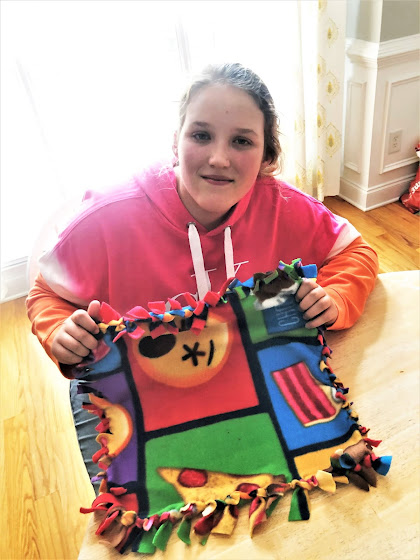
Continue tying the pieces of fleece together until you have worked your way all around the blanket. Your fleece tied blanket is now done.

You can, of course, add some personal touches if you like. You can embellish your blanket using fabric paint, embroidery, buttons or even heat-activated crystals.
Finishing
You can, of course, add some personal touches if you like. You can embellish your blanket using fabric paint, embroidery, buttons or even heat-activated crystals.
Comments
Post a Comment